Method 1: Using Registry Editor
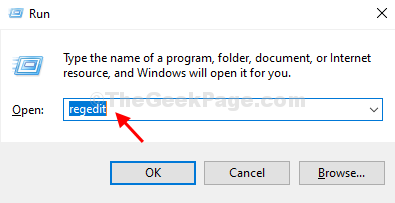
Step 1: Press the Windows key + R to open the Run command. Now, type regedit in the search box and hit Enter.
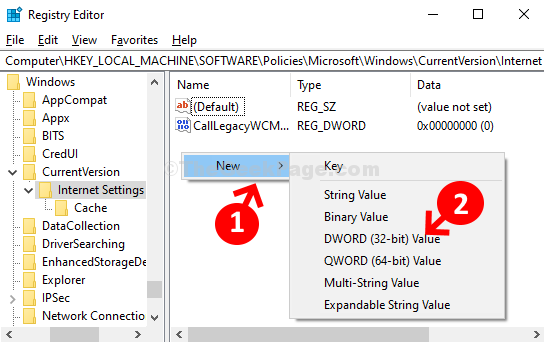
Step 2: In the Registry Editor window, navigate to the below path:
HKEY_LOCAL_MACHINE\Software\Policies\Microsoft\Windows\CurrentVersion\Internet Settings
Now, find the ProxySettingsPerUser registry on the right side of the pane. But, if the registry is missing, follow Step 3 to create it.
Step 3: On the right side of the pane, right-click on an empty area, click on New, and the select DWORD (32-bit) Value from the context menu.
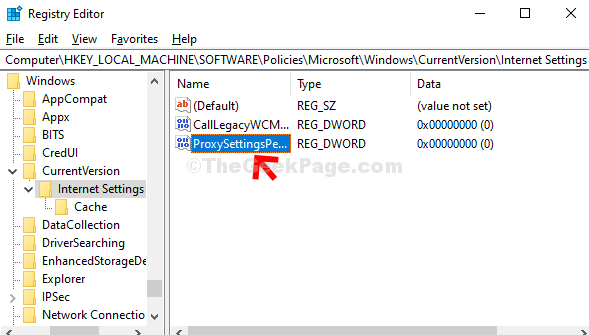
Step 4: Name the new value as ProxySettingsPerUser and double-click to open it.
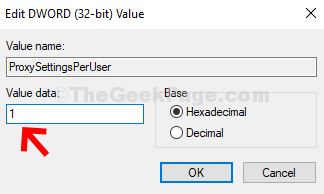
Step 5: In the Edit DWORD (32-bit) Value window, change the Value Data to 1 and hit OK.
Now simply restart your computer for the changes to be effective.
Method 2: Using Internet Properties
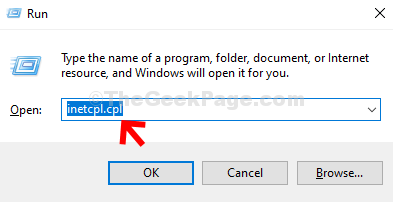
Step 1: Press The Windows key + R together on your keyboard to open the Run command. Now, type inetcpl.cpl in the search box and hit Enter.
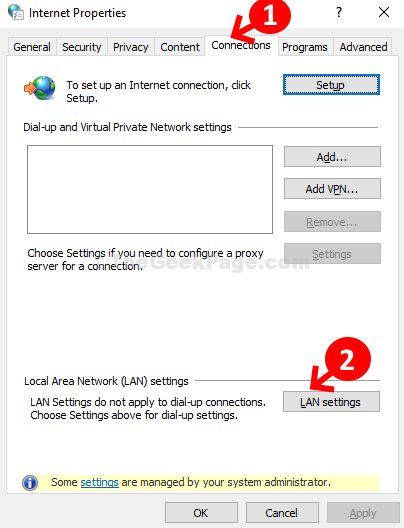
Step 2: In the Internet Properties window, click on the Connections tab and then click on the LAN settings button.
ADVERTISEMENT
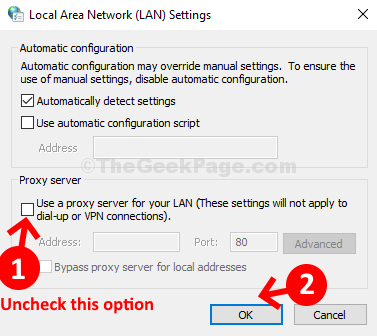
Step 3: In the LAN settings window, under Proxy server section, uncheck the box next to Use a proxy server for your LAN, and press OK to save the changes and exit.
That’s it. The Proxy Settings of your computer are now turned off.