
How to Clear Protection History in Windows 11/10
Way 1. Using File Explorer (Manually)
Windows Defender stores protection history logs as accessing files on your computer. So, you can manually clear protection history through File Explorer.
Step 1. Press Windows + E key combinations to open File Explorer. Then move on to the View tab and check the checkbox next to Hidden items.
Step 2. Type C:\ProgramData\Microsoft\Windows Defender\Scans\History\Service in the address bar and press Enter. Or you can navigate to this location layer by layer.
Step 3. Select all files and right-click to choose Delete.


How to Stop File Explorer From Showing External Drives Twice
Way 2. Using Event Viewer (Manually)
Windows Event Viewer displays a log of application and system messages, including errors, information messages, and warnings. If you do not know how to clear protection history, you can use it by referring to the following steps.
Step 1. Type Event Viewer in the Windows search box and click it from the best match result.
Step 2. Expand Applications and Services Logs by clicking the inverted triangle button next to it. Then expand Microsoft > Windows. And then scroll down to expand Windows Defender.
Step 3. Click on Operational and choose Clear log from the right panel.
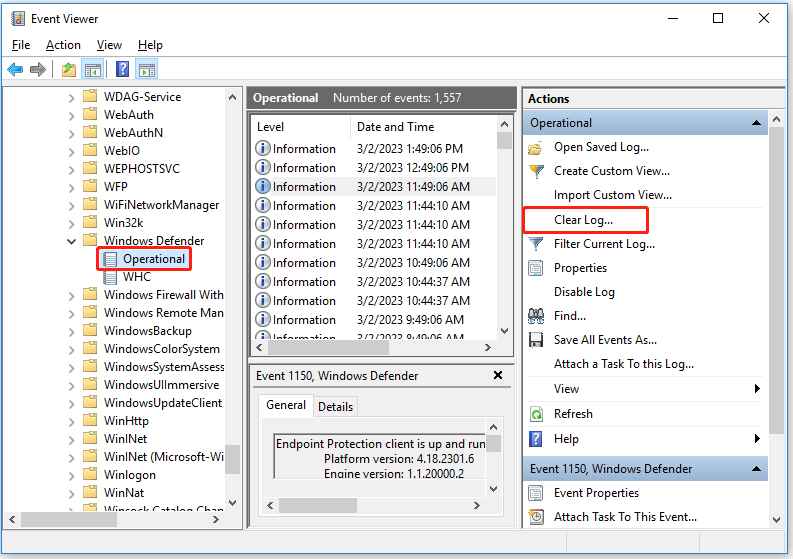
Step 4. In the pop-up window, click Clear or Save and Clear to clear the log.

How to Fix Virus and Threat Protection Engine Unavailable
Way 3. Using Windows PowerShell (Automatically)
Windows PowerShell is a command-line tool that is commonly used to automate system administration. Here you can set it to automatically clear Windows Defender protection history.
Step 1. Type Windows PowerShell in the Windows search box and right-click it to select Run as administrator.
Step 2. In the pop-up window, select Yes to allow this app to change your computer.
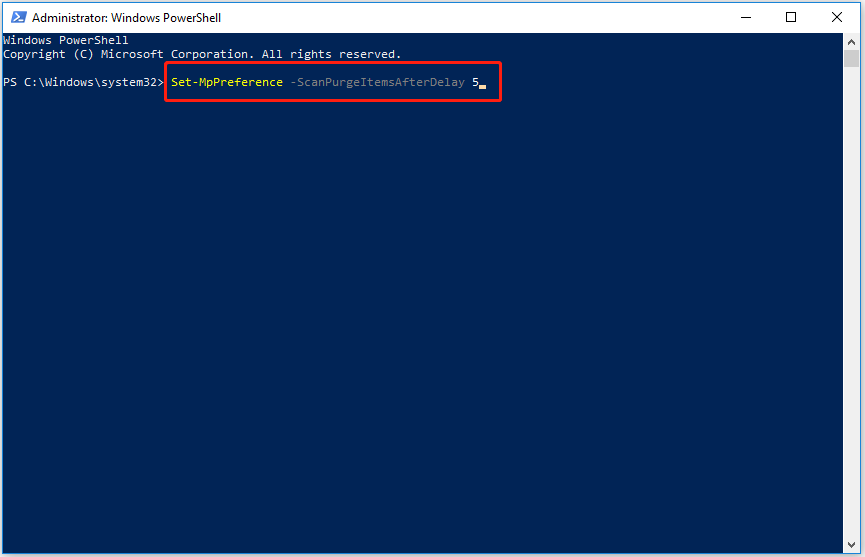
Step 3. Type this command: Set-MpPreference -ScanPurgeItemsAfterDelay N and press Enter (N refers to the days after which you want the protection history to be automatically cleared).
For example, if you want the protection history to be automatically cleared after 5 days, you need to type this command line: Set-MpPreference -ScanPurgeItemsAfterDelay 5.
How to Make Windows Defender Scan USB Automatically
Way 4. Using Local Group Policy Editor (Automatically)
Local Group Policy Editor is a Microsoft Management Console (MMC) snap-in. You can configure and modify group policy settings through this tool. Also, it can help you clear protection history automatically.
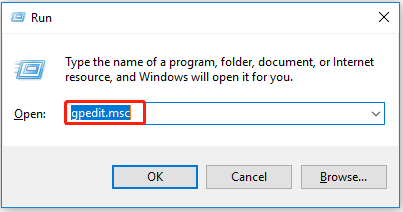
Step 1. Press Windows + R keyboard shortcuts to open Run.
Step 2. Type gpedit.msc in the input box and press Enter.
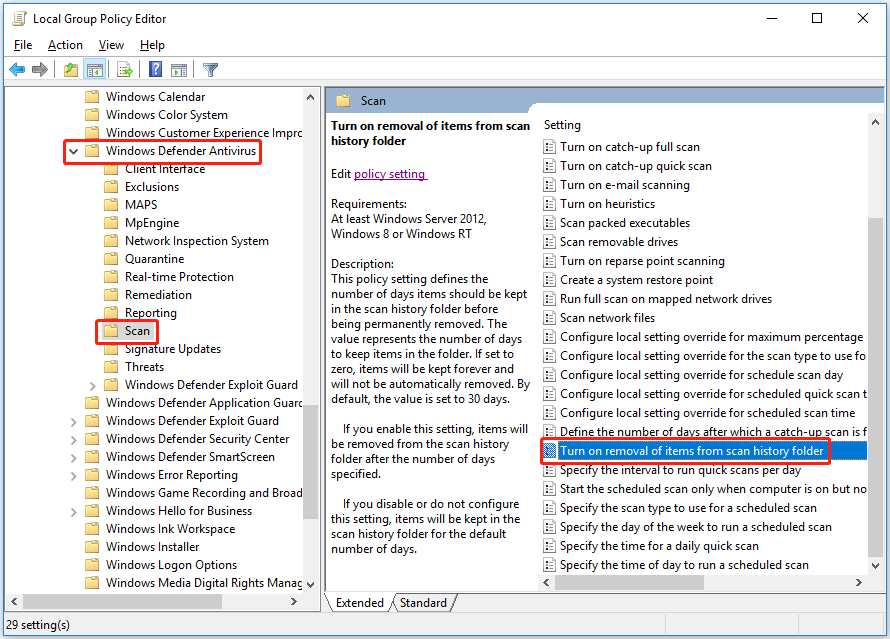
Step 3. Expand the following folders one by one: Computer Configuration > Administrative Templates > Windows Components > Windows Defender Antivirus.
Step 4. Under the Windows Defender Antivirus section, select Scan.
Step 5. On the right panel, double-click Turn on removal of items from scan history folder.
Step 6. Select Enabled in the new window. Then set up the number of days that items should remain in the scan history folder before being permanently deleted, and click Apply.
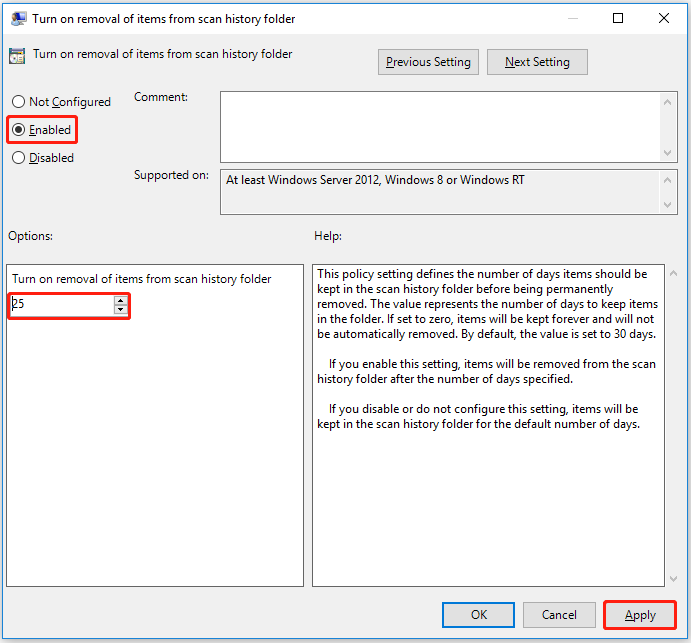
Now, all operations have been done, and you won’t need to clear protection history manually. The system will automatically clear Windows Defender protection history according to the number of days you set.